MS Word Bibliography

A bibliography lists all the books, articles, and web sites that are used to do research for your nonfiction book, whether they are quoted from or not. In my first nonfiction book I chose to only list books and articles in the bibliography due to the volume of sources used. I put the websites that were quoted in the endnotes.

There is an unwritten rule that if you use more than 300 words from one source that you should get permission to use the content. This is easy enough to do by contacting either the author or the publisher (contact info will be in the book or on their website). Once you get permission, include a statement such as, “Used with permission” in your Bibliography.

Bible quotes are more lenient, but permission is still required if you exceed the word limit. You will need to check for the individual Bible translation(s) you use. Be sure to include a permission statement on your  copyright page for every translation used. Entries are not needed in the bibliography.

It is good to begin creating a source list in MS Word right away since you can reference them as you write.

To create a new source, from the References tab choose Manage Sources. In the Source Manager click new, select the Type of source, and fill in the information.

To insert a Bibliography, create a new page at the end of your document (before the index). In the Reference tab choose the style from the drop down box (APA is commonly used). Then choose Bibliography and then Insert Bibliography.

If the Bibliography is not formatted the way you would like, you can change one entry and then update the Bibliography Style (right click, Styles, update)

As you add more sources, you can update the Bibliography by right clicking in the grey area and choose Update Field. Be sure to do this right before uploading to be printed.

MS Word Index

It is a good idea to create an index for a nonfiction book that might be used as a reference book by your readers.

First determine what the significant words are in your manuscript. They might include your chapter titles. I will use the name King Josiah as an example. Anywhere in the text highlight “King Josiah” then in the Reference tab, choose Mark Entry.

To see the marked entries, in the Home tab choose Paragraph mark (that shows/hides hidden formatting symbols. As you toggle this button on and off, you will see the hidden marks appear or disappear. The index entries will be in curly braces and start with XE.

To insert an index, create a new page and from the Reference tab, choose Insert Index. Click in the index and a grey area will appear where the index field was inserted. To update the inserted index, simply right click in the grey area and choose Update Field.

I highly recommend going through your index with a detailed eye to be sure every entry is exactly what you want. To delete an entry, copy the hidden index entry (include the curly braces) and do a search an replace.

What is Formatting

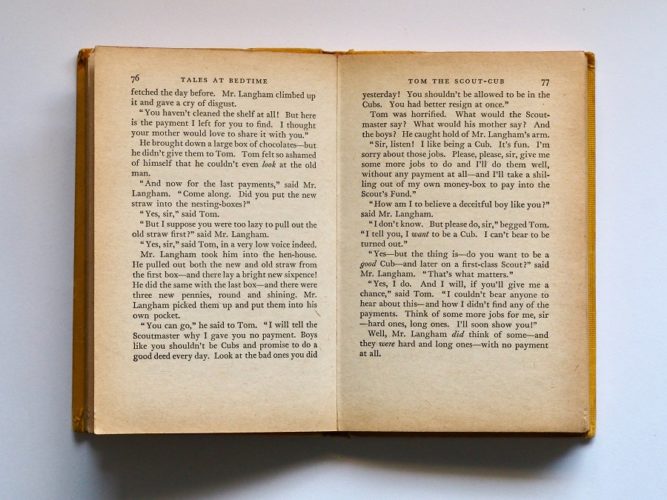
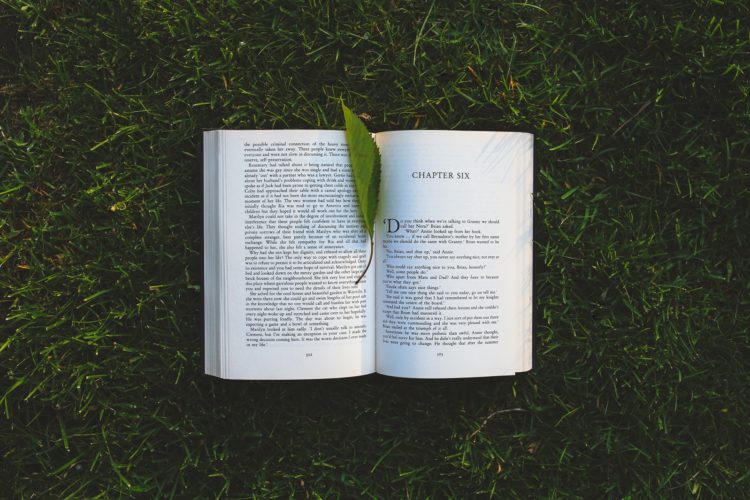
Open a book. Don’t read the words, but instead notice the white space and blocks of text. Formatting is the artistry of a book.  No two are the same.

I recommend going to a book store to help you determine the artistry of your book. These books are products of big publishing houses. Your mission is to replicate the one you like the best.

Do this exercise with paperbacks, since that will most likely be your format. Open random books. IGNORE THE WORDS! Look at the color of the paper, style of the words, and the amount of white space on the page.

Compare chapter title pages with regular pages. Usually title pages have swirls, lines, or an image.  Compare left and right hand pages (notice headings and page numbers). Use a ruler to measure the margins, letter height, line spacing, spacing between letters, size of the book, and anything else that seems significant.

Determine the measurements and characteristics that are the most pleasing to you and write them down.

Then check with who ever is going to print your book to see if they have any requirements. Createspace is particular with margins.

Next you are ready to set up your document using MS Word Formatting for Paperbacks.

MS Word Styles

Using styles is a great way to stay organized, cut down formatting time, and easily peruse your book. It will also make creating a Table of Contents easy peasy!

To use a style, highlight your text and choose a style from the MS Ribbon.

  • Heading 1 for all chapter titles
  • Heading 2 for subtitles
  • Regular text will automatically be Normal

  • Create your own styles for unique items like indented quoted text, references, end notes, etc. Here’s how:

Format your text first (font, size, color, etc.) then right click, choose Save selection as a quick style – give it a unique name like Indent Quote. It’ll then show up in the Home ribbon as a style. (You can see the unique styles I created below).

If you decide to change the format of your indented quotes, you only need to adjust one indented quote and then right click and choose “Update to match selection” which will change all text in your document that has your Indent Quote style!

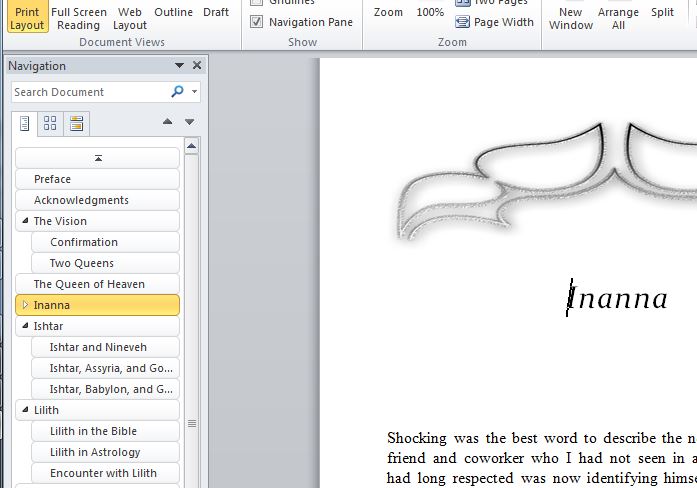
After your styles are defined, you can use the Navigation Pane (View tab) to see a quick outline and jump to sections by clicking on the titles. Styles with Heading 1 and Heading 2 will be listed.


MS Word Paperback Formatting

These format settings will be predetermined by your book store visit. Numbers in the examples are purely for your reference and not set in stone.

If you already began formatting your eBook, make a copy of that file and name it paperback. These changes will be made in that new new paperback file. From now on, any editing for content will have to be made in these two separate files.

Page Setup
Margins

Gutter is the space allowed for the binding of the book. This number should be defined by whoever will print your book based on your page count.

Top margin will contain the book title, chapter title, and/or author name. So it will need to be a bit larger than the footer that will only contain the page number.

Page Size

Will be defined via Custom Size

Page Breaks

As you write, let the pages break themselves. However, you will need to make sure your Chapter titles fall on odd pages.  To do this, insert a break and choose odd page.

Header

If you double click on the heading area (even if it’s empty), the Header & Footer tab will appear. Check both – different first page and different odd and even pages.

To make the header different for a new chapter, click “Link to Previous” in order to unselect it.

Font

It is wise not to use the fonts included in MS Word. Determining what font to use will take a bit of research (search on “preferred font for” and your genre). After downloading the new font, drag the font file into the Control Panel Font section.

Back in your document, open the Font window from the Home tab and select the font you installed. In the Advanced tab for font choose “Expanded’ character spacing and then determine how much you would like.

Paragraph
Alignment

Choose Justified for normal text. This will give a professional finish by filling out each line to the margin on the right. This may require you to use hyphens for lines that are too spread out.

Chapter titles and subtitles will either be Centered or Left.

Indention & Spacing

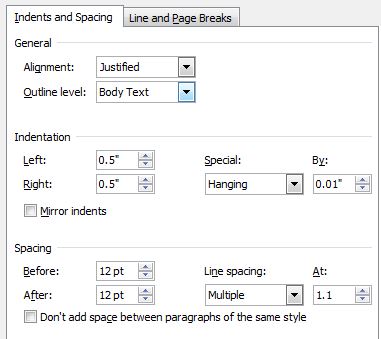
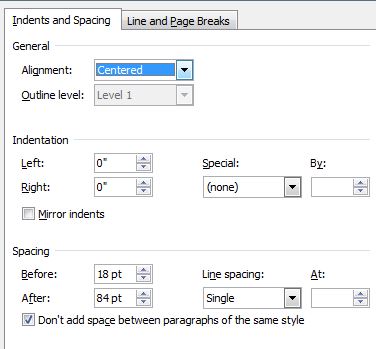
Normal text, chapter titles, subtitles, and indents will all have different settings. If you already have your styles set, you can just change one area of text, right click, and update  your style. Then every place that style is defined, the settings will change automatically.

Here are some examples:

Indented (for long quotes):

Chapter title:

Line breaks

There is a rule that there should not be a single line at the top or bottom of a page. This can occur if a new paragraph begins at the bottom of a page (orphan) or ends at the top of a page (widow). To keep this from happening, check “Widow/Orphan” control.