

These format settings will be predetermined by your book store visit. Numbers in the examples are purely for your reference and not set in stone.
If you already began formatting your eBook, make a copy of that file and name it paperback. These changes will be made in that new new paperback file. From now on, any editing for content will have to be made in these two separate files.
Page Setup
Margins
Gutter is the space allowed for the binding of the book. This number should be defined by whoever will print your book based on your page count.
Top margin will contain the book title, chapter title, and/or author name. So it will need to be a bit larger than the footer that will only contain the page number.
Page Size
Will be defined via Custom Size
Page Breaks
As you write, let the pages break themselves. However, you will need to make sure your Chapter titles fall on odd pages. To do this, insert a break and choose odd page.
Header
If you double click on the heading area (even if it’s empty), the Header & Footer tab will appear. Check both – different first page and different odd and even pages.
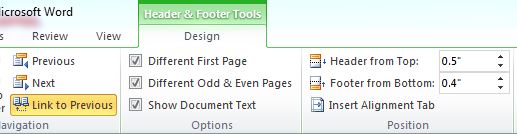
To make the header different for a new chapter, click “Link to Previous” in order to unselect it.
Font
It is wise not to use the fonts included in MS Word. Determining what font to use will take a bit of research (search on “preferred font for” and your genre). After downloading the new font, drag the font file into the Control Panel Font section.
Back in your document, open the Font window from the Home tab and select the font you installed. In the Advanced tab for font choose “Expanded’ character spacing and then determine how much you would like.
Paragraph
Alignment
Choose Justified for normal text. This will give a professional finish by filling out each line to the margin on the right. This may require you to use hyphens for lines that are too spread out.
Chapter titles and subtitles will either be Centered or Left.
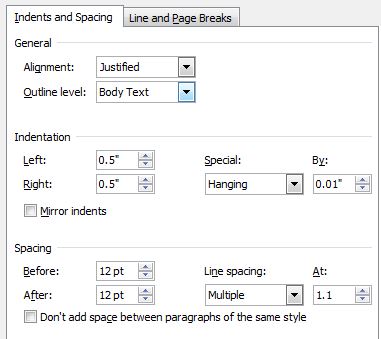
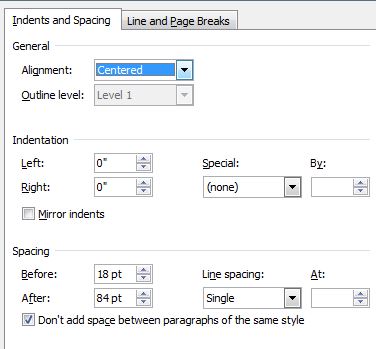
Indention & Spacing
Normal text, chapter titles, subtitles, and indents will all have different settings. If you already have your styles set, you can just change one area of text, right click, and update your style. Then every place that style is defined, the settings will change automatically.
Here are some examples:
Indented (for long quotes):
Chapter title:
Line breaks
There is a rule that there should not be a single line at the top or bottom of a page. This can occur if a new paragraph begins at the bottom of a page (orphan) or ends at the top of a page (widow). To keep this from happening, check “Widow/Orphan” control.